
Black Forest cake 2023
- Jul 17, 2023
- 4 min read
Updated: Dec 21, 2024
The Black Forest cake is clearly one of my favorite desserts! I like this mix of flavors and these different textures. But, it must be admitted, the original version is not the lightest there is! That's why I wanted to revisit it by bringing even more delicacy but above all a perfect balance! On my blog, you will already find a version of the Black Forest cake but really different compared to the one I propose to you today. You will find it here.

For this new version, I wanted to make a really laser assembly cake with very regular layers and to finish, a daisy-style stencil that throws it!
My Black Forest cake 2023 consists of : cocoa biscuit soaked in cherry juice (which I collect from my cherries in jars), a creamy 70% dark chocolate, a second layer of cocoa biscuit still soaked in cherry juice, a candied cherries and cherries, a delicate vanilla mousse and vanilla whipped cream.

For the assembly of the insert, I use a circle of 16cm in diameter by 6cm high (but normally you will easily have a good 1 cm free between the cherries and the top of the circle! It is very important that the insert can't reach the height of the circle. Once it is well frozen, I place it in a larger circle (this time 18cm in diameter by 6cm high), filmed, and I garnish with a delicious and light vanilla mousse. I leave 0.5-0.8mm without anything between the mousse and the top of the circle so that the dark chocolate strapping is almost at the same height as the cake. Once well frozen, I remove the circle by passing a blowtorch while I finish with the chocolate strapping and the piping of the whipped cream.

For the chocolate strapping, I tempered dark chocolate which I then spread in a thin layer on a 6cm high rhodoïd ribbon and before it froze I placed it around the 18cm diameter circle.
I used the Wilton 125 petal nozzle to make this piping. I trained a lot to get this result. I advise you not to make your whipped cream too firm otherwise it may grain during poaching. Of course, it must hold together but remain flexible!
I show you just below how I pocket (it's not the black forest cake here) but at least you see the gesture.
The Black Forest cake must defrost at least 4 hours in the fridge before tasting. It keeps very well, until the next day without problem. Don't hesitate to give me your feedback!
Ingredients for a Black Forest cake 18cm in diameter (6-8 people):
The cocoa biscuit (D-2) :
70g egg yolks
60g caster sugar
25g cocoa powder
35g flour
70g egg whites
12g caster sugar
25g of butter
1- Beat the egg yolks with the 60g of sugar. Sift the cocoa with the flour.
2- Whip the egg whites with the 12g of sugar. Melt the butter.
3- Incorporate some of the whites into the yolks. Add the flour and cocoa, then the rest of the egg whites. Mix gently.
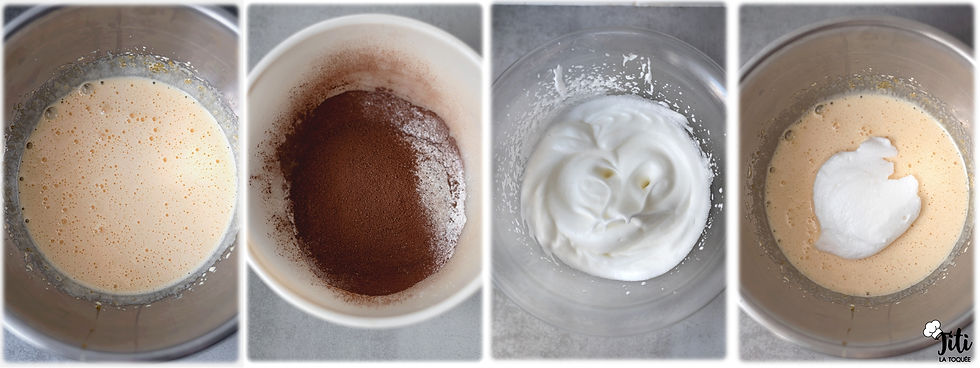
4- Take a small part of the biscuit, add the butter and remix the whole.
5- Pour everything into a circle 18cm in diameter and bake in a preheated oven at 160°C for 10 to 15 minutes.

6- Unmold and let cool completely before cutting in half.
Creamy dark chocolate (D-2) :
150g full cream
22g of egg yolks
6g of sugar
7g gelatin mass (1g gelatin powder and 6g water)
60g 70% dark chocolate
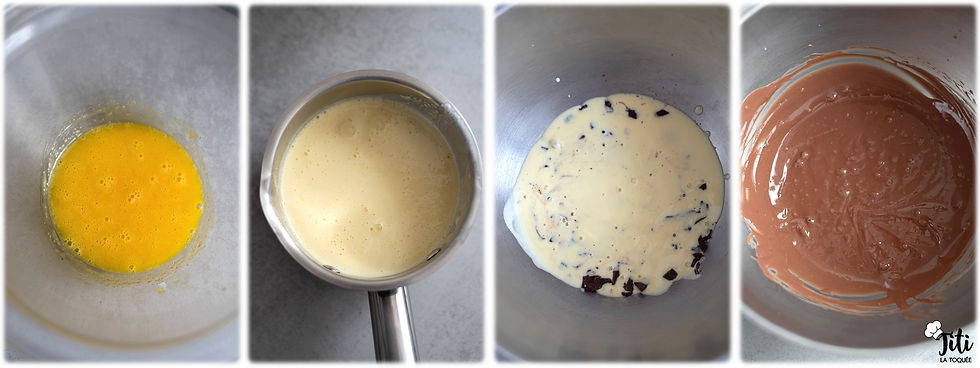
1- Heat the liquid cream.
2- Whisk the egg yolks with the sugar. Pour the hot cream over the yolks and transfer everything to a saucepan.
3- Cook just until 83°C, stirring continuously.
4- Add the gelatin mass off the heat and stir.
5- Pour the custard over the chopped dark chocolate with the pinch of fleur de sel. Mix.
Cherry confit (D-2) :
315g cherries
20g of sugar
4g NH pectin
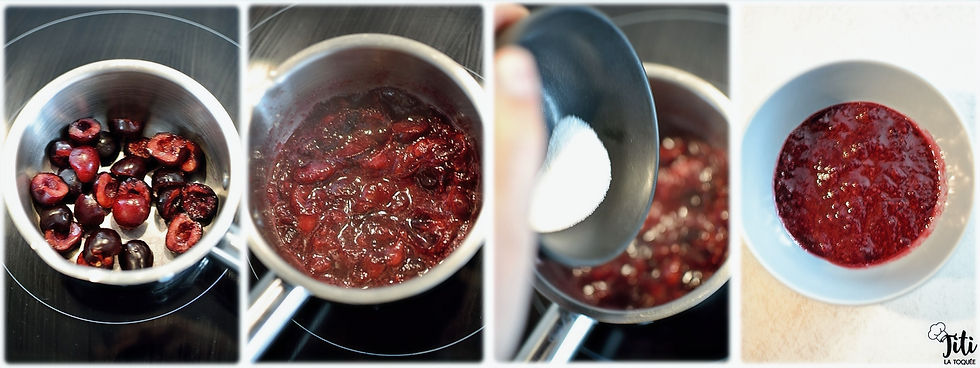
1- Wash, pit the cherries and stew them.
2- Add the sugar mixed with the pectin and boil for a few minutes. Mix.
Assembly of the insert (D-2) :
SQ cherries
1- In a circle 16cm in diameter by 6cm high, wrapped in film and lined with rhodoïd, place a cocoa biscuit. Soak it in cherry syrup.
2- Add the creamy dark chocolate. Smooth.
3- Add the second cocoa biscuit, soak it again.
4- Spread the cherry confit. Add enough cherries. Block in the freezer overnight.

Vanilla mousse (D-1) :
18g gelatin mass (2.3g gelatin powder and 13.8g water)
20g egg yolks
20g of sugar
65g whole milk
14g full cream
1 vanilla pod
200g full cream
1- Bring the milk, the 14g of liquid cream, the seeds of the vanilla pod to a boil.
2- Whisk the egg yolks with the sugar. Pour the hot milk over the eggs, mix and then cook again to 83°C.

2- Whisk the egg yolks with the sugar. Pour the hot milk over the eggs, mix and then cook again to 83°C.
3- Add the gelatin mass. Leave to cool to 25°C.
4- Whip the 200g of whipped cream. Add the whipped cream to your custard. Mix gently.

5- In a circle of 18cm in diameter by 6cm high previously filmed, place the insert well in the center. Pipe the contours of vanilla mousse and smooth. Block in the freezer overnight.

Mascarpone vanilla whipped cream (D-1) :
300g full cream
10g of sugar
10g gelatin mass (1.4g gelatin powder and 8.4g water)
1 vanilla pod
30g mascarpone
1- Infuse the vanilla in the liquid cream. with the sugar.
2- Add the gelatin mass, the rest of the cold liquid cream and the mascarpone. Mix, film and keep cool all night.
3- The next day, remove the circle, pipe in whipped cream and defrost for at least 4 hours in the fridge.


Comments